Interview Series
Driven to Perfection
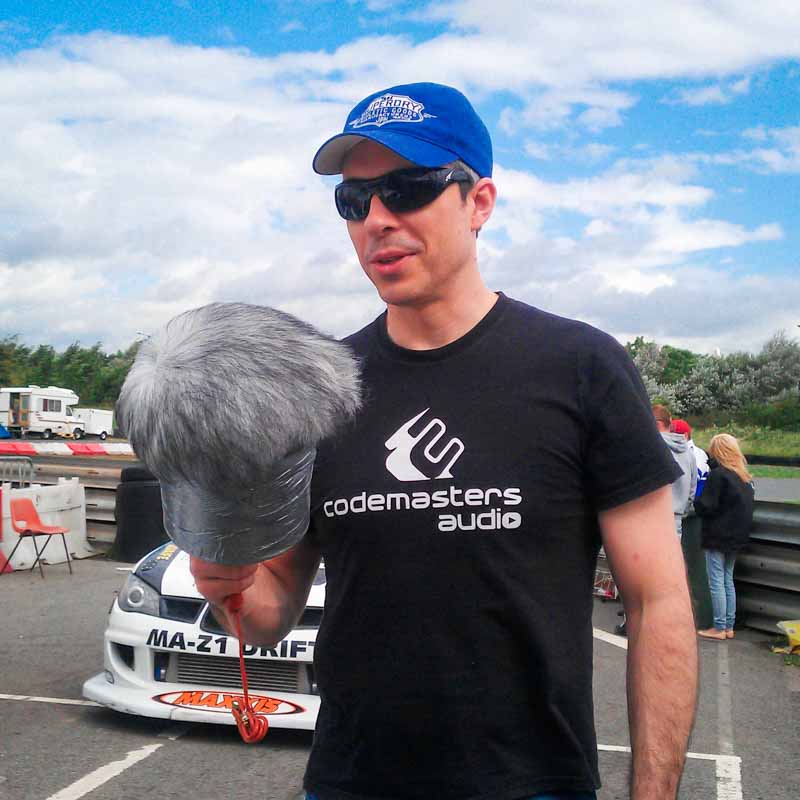
Game Audio Sound Design at Codemasters
Chris Jojo – Senior Sound Designer at Codemasters Software – talks to us about the unique and demanding fieldcraft of vehicle recording, shedding light on his work in the games industry and the methods behind sound capture for acclaimed rallying title DiRT4.
Tell us a bit about yourself and your work as a sound designer in the games industry.
I’m Senior Sound Designer and Principal Sound Recording Engineer at Codemasters Software Ltd: a BAFTA-Award-winning developer of next-gen console games specialising in motorsports titles such as Formula 1, GRID, Micro Machines and DiRT Rally.
I’ve been working in game audio production for the past 22 years. Prior to this, I worked in film and television post-production. My work has encompassed field and foley recording, sound design, music composition and production, IR authoring and surround mixing.
I’m very fortunate to have worked alongside many talented people and to have been involved in a variety of projects across a diverse range of gaming genres. With the exponential advancement in game platform audio capabilities and associated tech, each new console generation presents a fresh host of challenges, calling for new kinds of learning and a greater appreciation of the ongoing process of sound design (integral to which is the recording of source audio assets).
As a long-standing user of Rycote products, it’s a pleasure to be able to talk about my work here alongside renowned industry professionals.
My interest in sound recording and my awareness of sound design was initially sparked way back in the summer of 1977, when – as a wide eyed nine-year-old – I witnessed Star Wars for the first time.
How did you start out in sound?
My interest in sound recording and my awareness of sound design was initially sparked way back in the summer of 1977, when – as a wide eyed nine-year-old – I witnessed Star Wars for the first time in a packed-out Odeon cinema in Manchester. I was completely awestruck: utterly captivated by the sensory spectacle unfolding before my eyes and resounding in my ears.
It was sound editor/recordist Ben Burtt’s innovative work on the film, his subsequent output with Skywalker Sound and the inspiring work of contemporaries such as Frank Serafine, Randy Thom, Gary Rydstrom and Walter Murch that set me on a path of discovery which ultimately lead to a career in the games industry as a sound designer.
My first steps working in professional audio came about while I was still at college. I’d taken a course in Sound Engineering and Music Production, and through my involvement with fellow students – most of whom were musicians – I became involved in engineering sessions for bands around a few local recording studios, as well as producing my own music. It proved an invaluable practical experience; I was able to apply what I’d learnt and experiment with microphone set-ups, processing and production techniques whilst also benefitting from the mentorship of the studios’ resident engineers.
From college, I went on to study at Manchester University of Art and Design, graduating with a BA in Design for Communications Media. After a brief stint with Palace Pictures working as a storyboard artist for film producer Joanne Seller, I landed a job at a film and television post-production company based in Hong Kong.
It was during this time that I became aware of the burgeoning computer games industry: the 4th generation of 16-bit games platforms driven by Nintendo, Sega and NEC were becoming hugely popular worldwide with software development studios starting to emerge in the UK. I’d bought a Super Nintendo (Famicom) console while in Hong Kong, and I quickly became an avid gamer and fan of the creative talent responsible for some of my favourite titles. (Most notably, game designer Shigeru Miyamoto and sound designer/composer Koji Kondo.)
The notion of working as a sound designer and composer in such a creative, fledgling industry really appealed to me. By pure serendipity, I was contacted out of the blue by a friend from my college days who was working for the UK-based games developer Software Creations, enquiring if I was interested in such a role. Needless to say, I accepted. Some 10 platform generations later, it’s the industry I’m still working in and passionate about.
What are you up to at the moment? Any exciting projects in the pipeline for Codemasters?
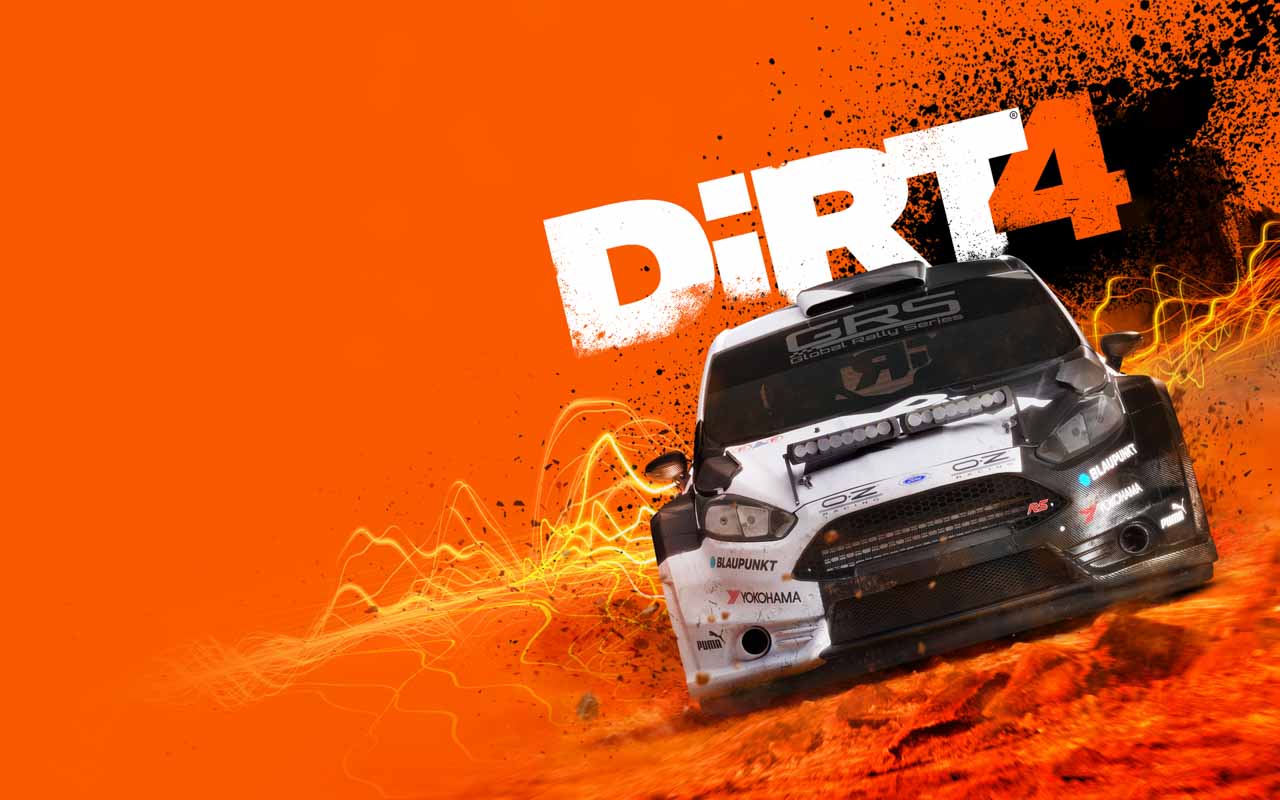
We recently completed work on DiRT4: Codemasters’ latest release in the DiRT canon of award-winning, off-road motor racing games. Following off the back of the PC-only, early access DiRT Rally, it’s the company’s purest expression of a rally simulation to date and a project I’m extremely proud of. My fellow audio team members and I consider it to be amongst the best sounding titles in Codemasters’ canon.
DiRT4 marked a significant departure from Codemasters’ previous releases in terms of its developmental approach in conveying a more realistic simulation of off-road racing. It’s somewhat leaner in scope than its predecessors, delivering a far more focused and authentic representation of rallying. In the game, the player attempts to master the minutiae of motorsports driving, with constant input and concentration required in order to clear a car across some very challenging, iconic rally stages and rallycross circuits.
The shift towards a more realistic sounding game was a boon for the audio team. We were all in agreement that we wanted to distance ourselves from an over-stylised, hyper-real ‘Hollywood’ approach (a style co-opted by many racing titles on the market) in favor of a more natural sounding, accurate representation of the rally experience, preserving both dynamics and headroom at output.
Pivotal to DiRT4’s sound design was the need for a significant number of authentic sound recordings. Car engine audio and mech aside, there were requirements for a variety of rolling surfaces, kick-up and particulate, skids, multi-surface/material collisions and impacts, props, crowds, weather and ambient environmental sounds.
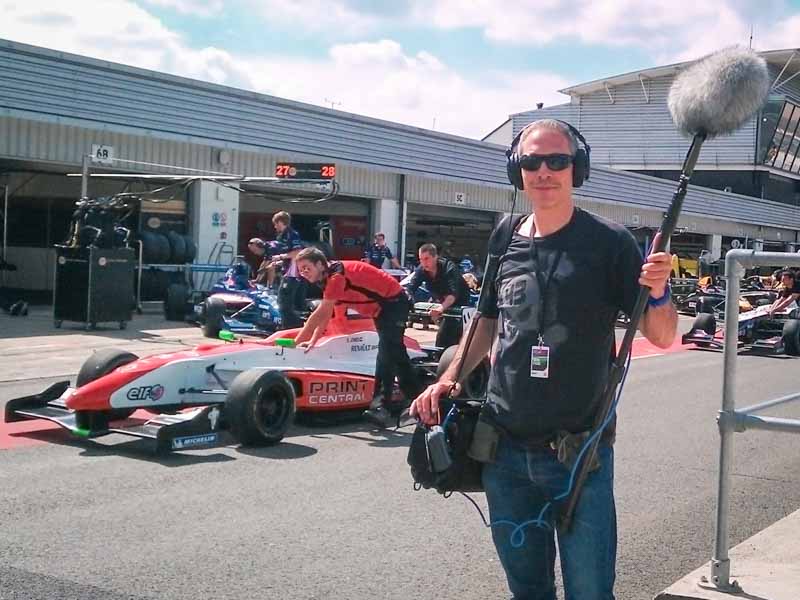
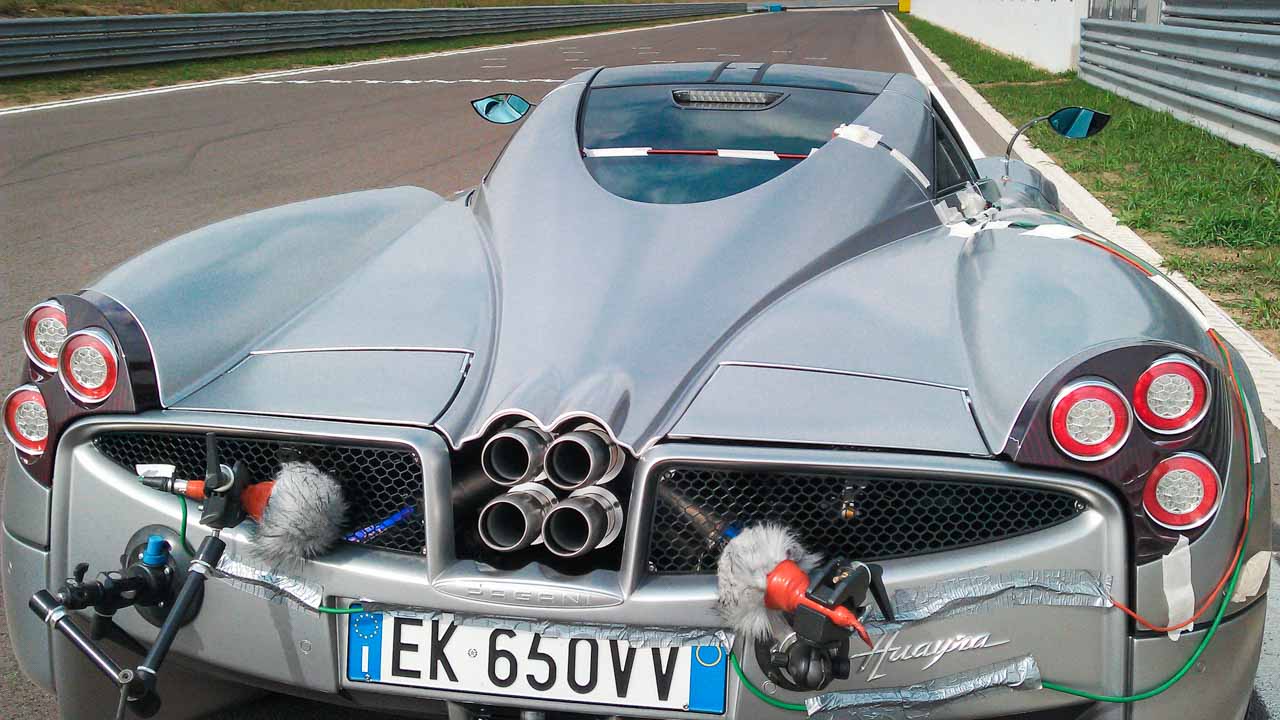
Rycote Modular Windshield kits and Softies were used throughout exterior sound recordings. Their robust build quality, durability and effectiveness ensured consistently good results no matter how punishing the conditions (and they’ve been subjected to some pretty harsh punishment over the years!).
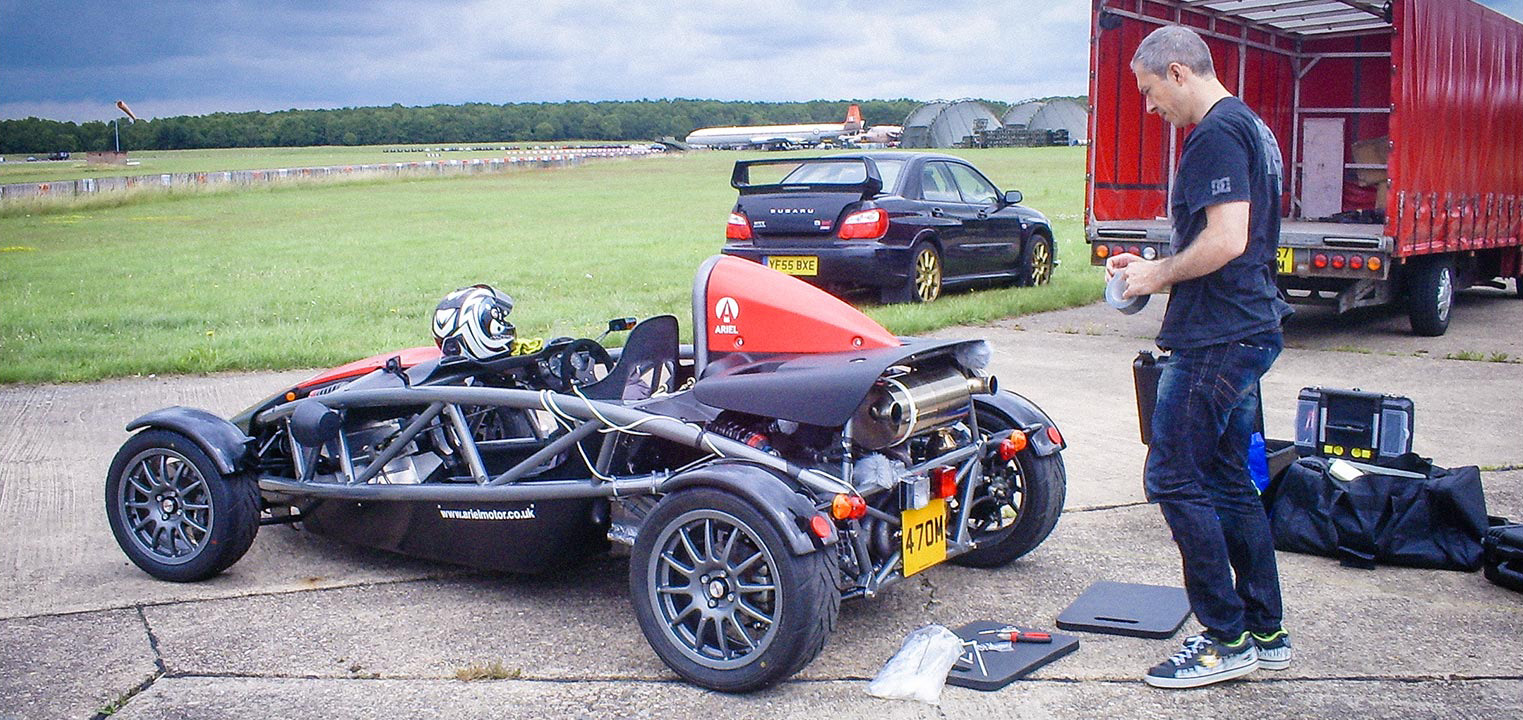
I also used the [discontinued] A5 boom pole on a number of location recordings and sessions. Its ease of use in being able to quickly adjust and lock boom length is great for roving situations where a subject isn’t easily accessible or safe to be in close proximity to. On DiRT4, it proved particularly useful for recording multi-terrain car skids and kick-ups. I was able to track the tyres at contact a few feet away while maintaining a safe distance track-side at World Rallycross circuits and on rally stage apexes.
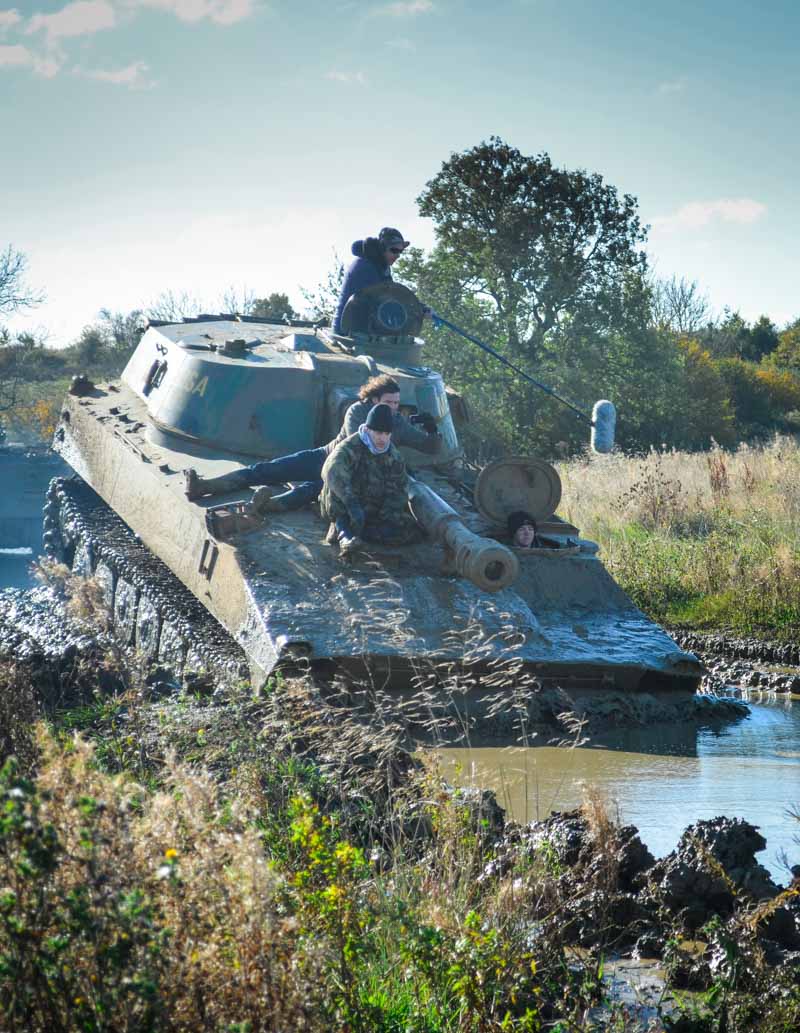
In another instance, the A5 was used onboard a military APC crossing fords and plowing through muddy banks, enabling me to focus the mic on capturing the churning water and mud kick-up splatter from the rear top hatch of the vehicle.
Tearing down a narrow dirt track at 130mph on a farm flanked by a herd of roving cows in an Audi Quattro S1 Group B rally car was one instance of such guerrilla style recording that I won’t forget in a hurry!
Anything you can tell us about capturing car audio specifically? Any particular thoughts or approaches you might have?
Car audio is undoubtedly the focal point of any motorsport game’s sound and one aspect that fans are most vocal about in either their appreciation or criticism: especially if their expectations aren’t met. It’s an aspect of game sound that Codemasters has always attached significant importance to, and has earned a reputation for portraying realistically over the years.
Pivotal to representing this facet of game audio convincingly are a number of factors, primarily: sourcing the right match of car for recording; capturing the requisite, on-board performance takes from which to build the in-game car engine audio; the type of audio system or model by which the processed audio assets are implemented; and having the necessary ‘real world’ handling, physics and mechanical parameters in place that underpin run-time playback in-game. When these factors come together, the constituent parts of on-board audio should interact seamlessly when triggered at run-time, responsive to every blip of a throttle – from idle to peak revs – and reactive to the rapid slip and loss of traction, gear shifts and off-load deceleration.
I’ve been responsible for the sourcing and sound recording of cars for Codemasters titles for the better part of 6 years. During this period – and thanks to plenty of in-the-field experimentation – I’ve gradually developed a ‘best practice’ approach for on-board recording applications across a variety of motorsports cars.
DiRT4 presented a number of challenges, including a limited budget for sourcing the actual cars and a relatively short timeframe in which to record them. The recent shift in development to new generation PlayStation 4 and Xbox One consoles afforded more memory and scope for engine audio, but it also meant that some of Codemasters’ older rally car recordings could no longer be utilised.
After the initial ‘spade work’ of tracking down the featured ex-works and current competition rally cars, deals were negotiated with various teams, privateers and engineering works, offering the parties involved an in-game brand presence and car liveries in order to offset some of the supply/running costs for the vehicles. The latter approach worked effectively in getting the most out of the budget, but it meant that many recordings had to be done off the back of ‘shake-down’ testing on track, or at locations that weren’t exactly conducive to on-board recording. Tearing down a narrow dirt track at 130mph on a farm flanked by a herd of roving cows in an Audi Quattro S1 Group B rally car was one instance of such guerrilla style recording that I won’t forget in a hurry!
Piggy-backing on team test sessions, where time was often limited, invariably meant paring down the on-board cue sheet to record the bare minimum of takes required for an in-game audio engine. No concessions were made to the established multichannel on-board miking of engine, exhaust, cabin, and transmission which in some instances extended to wheel well kick-up and suspension.
‘Rycote Modular Windshield kits and Softies were used throughout exterior sound recordings. Their robust build quality, durability and effectiveness ensured consistently good results no matter how punishing the conditions (and they’ve been subjected to some pretty harsh punishment over the years!).’
Chris Jojo
Sounds like there’s a huge amount of detail involved. Is there any more you can share with us, in terms of capturing the best possible audio and getting exactly what you require? Any additional thoughts or considerations?
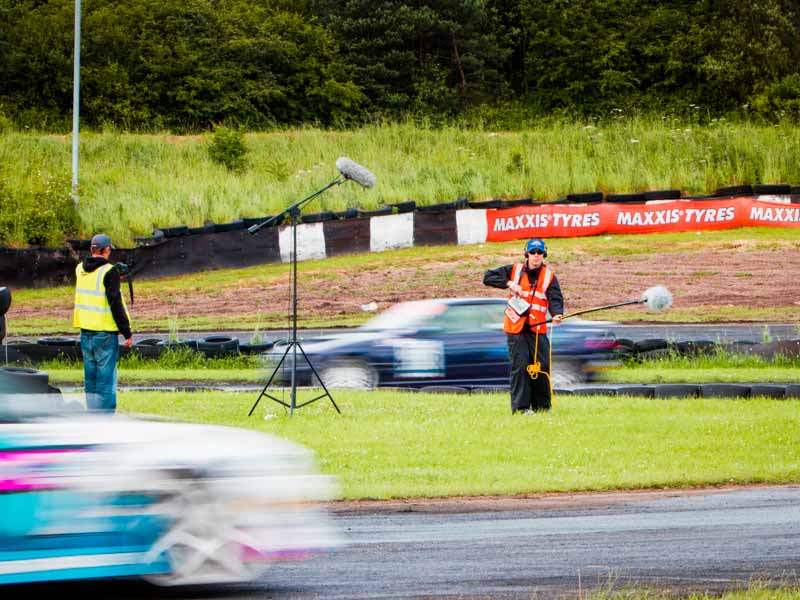
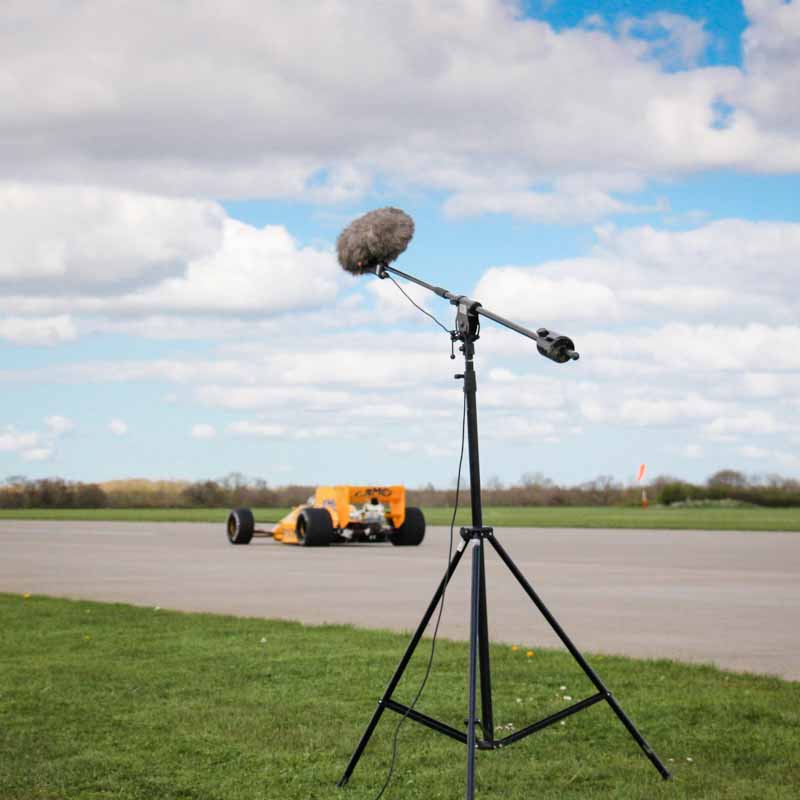
The majority of car recordings for Codemasters’ titles are conducted on track; rolling roads are rarely used due to their inability to run off-load decelerations. There are also inherent noise issues and a lack of consistency when recording across (non-anechoic) dyno-chambers. On-track car sessions offer far more scope for recording both the required on-board timed cues for an audio engine build, and externally. I generally set up a few heavy boom stands with shotgun mics in Rycote Windshields (MKH 60, RSM 191, VP 89) or have an assisting recordist shoot along the run of a track to pick up any ‘wild takes’ of the car manoeuvring, pass-bys, ambient detonations/overruns or any tyre squeals incidental to a session.
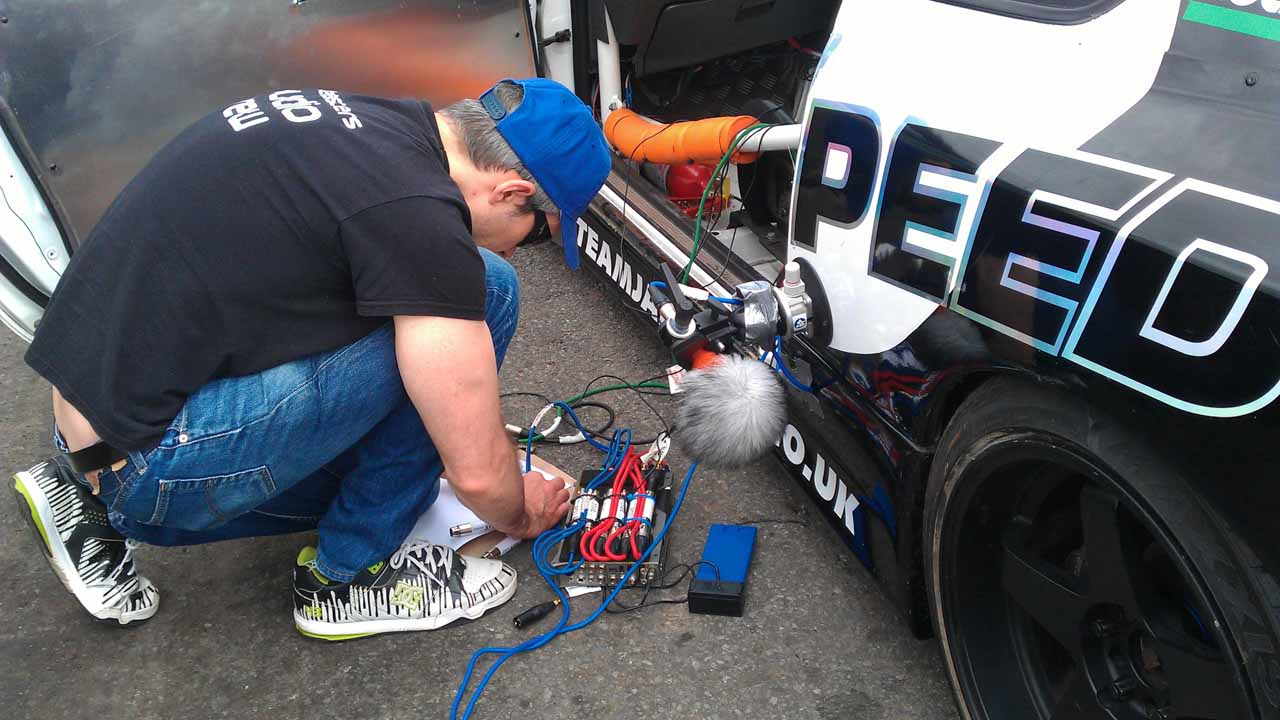
Safety is always the primary concern for car recording, aside from the obvious considerations of microphone choice and placement. Microphones and cabling must be protected against exposure to engine and exhaust heat. All microphone enclosures and cabling are fire treated with Pyrosil (a self-bonding, fire-retardant tape) and ‘fire jacket’ shrouds for cabling which are securely rigged and chased so as not to encumber the car or the driver.
All of the on-board microphones have to be protected against wind and airflow to some extent. For the engine microphones, simple, custom housings made using fire tape, heat treated steel mesh heads, fire-retardant acoustic foam and trimmed Rycote fur are sufficient to shield the capsules from updraft, venting and heat from the engine bay.
When mounting microphones externally over an exhaust, the obvious challenge is in protecting the capsules from heavy wind buffeting/airflow at high speed, significant exhaust heat, vibration and rain. Condenser microphones are far more susceptible to distortion from high speed wind buffeting pounding the diaphragm/back plate and are also prone to fail when an element is exposed to rain or extreme temperatures.
As robust as they are, Rycote Windshields are impractical in these situations due to their size, the amount of wind resistance and resultant drag their bulk would cause at high speed; instead, exhaust mics are housed in ‘gimps’ (purpose-built enclosures generally constructed from a perforated steel canister wrapped and capped with heat treated fine steel mesh, lined internally with 2.5mm acoustic foam and shrouded with fire retardant nylon and a layer of Rycote fur). The microphone body is recessed inside the cylinder with a cavity of space between the capsule and cylinder lining, then secured with a brass plumber’s collar assembly and bound with Pyrosil which insulates as well as protects from extreme heat.
Fashioned along similar lines to a typical Rycote basket, the exhaust gimps help dissipate the energy of heavy wind buffeting and eliminate low frequency rumble and distortion whilst providing some degree of rain protection (for a limited amount of time). The impact on frequency response from occluding a microphone in such an enclosure is negligible and the shaped frequency response of many of the microphones used – such as the DPA 4062 (with high boost grids), DPA 4011A, DPA 4007A, Shure SM58/57 and Sennheiser MD421/441 – compensate in part for any minor reduction in HF response.
The bodywork, shell and location of a car’s exhaust will dictate the method of microphone placement and attachment. If magic arms and pressure cups are impractical, fire-retardant memory foam wadding can be built up to position a microphone. Whilst mostly protecting from vibration, this method also provides sufficient elevation and off-axis positioning from the bodywork to avoid any possible issues with phase cancellation.
In addition to the engine and exhaust mics, I’ll generally place a stereo mic in-cabin, centred behind the driver, as well as a pre-amped contact mic and super cardioid (Generally a DPA 4018) on the transmission line. A similar pairing is also used for capturing damper and coil suspension noise when a rally car is running on stage.
For capturing rolling surfaces, kick-up and skids I generally use a combination of short shotgun and omni boundary layer mics mounted at the top and side of a car’s wheel arches. I use fine gauze steel mesh and Rycote fur overlays on the rubber boundary layer mounts to protect the mics from wind and kick-up and will generally cut below 80Hz to remove low-frequency wind rumble.
While it’s great to have a good complement of high-quality microphones and recording gear, a pair of cheap mics and a handy recorder won’t preclude any aspiring vehicle recordist from getting good engine and exhaust recordings. When time’s been tight and an opportunity to record on the spur has presented itself, I’ve recorded with a pair of Shure SM57 dynamics and got perfectly workable recorded assets. The important thing is to be safe: protect the mics from heat and wind, secure them/mount them out of harm’s way… and have fun!
‘As a long-standing user of Rycote products, it’s a pleasure to be able to talk about my work here alongside renowned industry professionals.’
Chris Jojo
If you were going to provide a ‘top ten’ for your line of work – or a particular part of it – what would it look like? Anything gear-specific?
In no order of importance:
1. Use vinyl car wrap film to protect a car’s paint finish from suction pump cup mount pressure ring marks.
When using suction mounts with Arri/Manfrotto arms or K-Clamps on a car’s bodywork, there is a risk that the pressure and weight can leave a pressure ring on the top coat and paint finish: particularly if the paint is polymer-based (hardier cellulose finishes are less susceptible to this problem). While not so much of an issue with a rally car or similar vehicles, high-end supercars, classics and other ‘trailer queens’ have to be approached with due care and caution when chasing in mic rigging and mounts.
I’ve found the best way to protect paintwork is to apply adhesive backed vinyl car wrap film (such as 3M Scotchprint). The film is applied to the area of bodywork where a cup is to be mounted, leaving a generous margin around the mounting point surface area to ensure secure contact. The Vinyl provides effective protection, maintains vacuum cup pressure and is easy to remove and reposition. If reasonably clean after a session, it can be used again (though I wouldn’t advocate too much reuse). At around £12 for a two-metre roll, it’s a lot cheaper than footing a hefty respray or detailing bill!
2. Protect exhaust and external on-board microphones from rain / waterlogging.
In the event of rain on a session date, it’s worth having some zip-lock plastic freezer bags on hand for covering the mics to mitigate any water damage. This is particularly useful during periods of downtime when the car is not on track and out in the open getting lashed by rain, or being conveyed to a track venue on an open trailer.
Such a simple precaution can often save a session. Swapping out waterlogged mics can be very time consuming and costly: especially when you’re on the clock at an expensive track venue/proving ground, etc., or have limited access to a car during shakedown testing.
Silica gel pouches are also handy for wicking out any moisture in your recording kit. I always pack a few in with any back-up mics and have them in zip-lock plastic bags in a Peli case.
3. Pre-session planning (engine bay and exhaust photos).
Obtaining specs and photos of the car’s engine bay and exhaust(s) in advance of a recording session is very useful when deciding on the appropriate microphones to apply, how they should be protected and their placement. Many cars have recessed, under-chassis or side-porting exhaust tail pipes, or limited anchor points in a crowded engine bay. Having a good idea of a car’s specs, venting and body airflow will inform what you’re going to use and where you’re going to rig it going into a session and will ultimately save on time and make for smoother running of a session that could otherwise be hampered by troubleshooting. If you can’t get photos directly from the car owner or engineers, it’s generally pretty easy to find some suitable photo reference via an internet search (assuming that the car isn’t some kind of one-off, R&D prototype).
4. ‘Chase and tag’ cables.
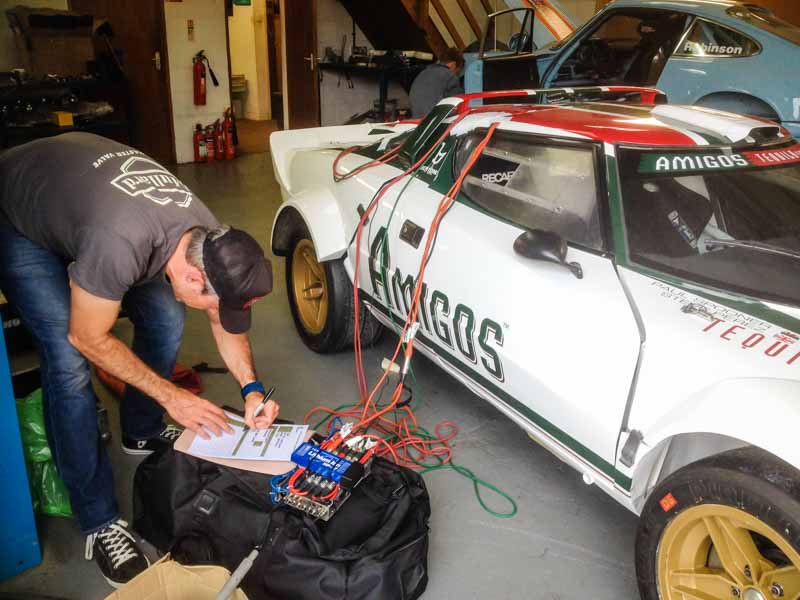
It might sound like a bit of a no-brainer, but on multi-mic onboard installations it’s important to keep track of routing and to tag and label the input cable ends (and any extension cable junctions) as soon as they’re chased through. I use 50mm width white PVC tape and label the mic model, location and input channel with a Sharpie (i.e. DPA 4007; exhaust; top centre C2). In the event that a mic or cable fails over the course of a session, it’s going to be a simple case of swapping out, avoiding the frustration and time wasted trying to pinpoint a defective mic or cable.
5. Finding the sweet spot.
In most car recording situations, microphones are often positioned off-axis to an on-board sound source, since suitable anchor points are often limited in the car’s engine bay or in proximity to an exhaust or exhausts. While a good understanding of a chosen microphone’s operating principle and characteristics is integral to optimal positioning, in such scenarios where mic placement is restricted, it’s beneficial to do a quick sweep around the sound source while monitoring on isolating headphones from the input channel of the audio recorder and pinpoint the best position for the mic. Get the driver to perform a few static throttle blips up to the rev limiter and find the sweet spot in the mic’s off axis pick-up angle: then it’s just a simple matter of positioning the grip or building up a suitable ridge of memory foam and taping it securely in place (Rhino white, waterproof Ultratape is my brand of choice).
6. In-situ monitoring and recording review.
If you’re able to conduct a recording session in-cab then it’s vital to monitor the individual multi-channel inputs during recording; this can be tricky if you’re trying to direct the driver in respect of any performance takes or specific timed cues. When possible, I start a session with a few recorded ‘installation’ laps around the track venue to check the onboard mics are all operating, set input levels and dial in any necessary high pass filtering if there’s any undesirable low frequency wind rumble. These initial laps also enable drivers to familiarise themselves with the circuit, identify the best sections of track for specific cues on the session take sheet, and warm-up the tires and car before really opening up the throttle.
Once everything’s set, I’ll quickly check everything on the recorder and review the recordings on a laptop running Reaper. If all’s good, I can move on and start the main session. It’s still important to periodically monitor soloed channels throughout the course of the session; if a mic fails or cable/mount detaches, you’ll detect it sooner rather than later.
If it’s not possible to sit ‘in-cab’ for a session (i.e. if it’s a one-seater car or similar), then it’s a case of recording the installation laps, having an initial review and making any necessary adjustments, then conducting the session either over radio, or by briefing the driver a few takes at a time and checking the recordings as you go.
7. In-line attenuators.
Most multichannel digital sound recorders don’t have built-in input attenuators and given the high-decibel output of most motorsports cars, in-line attenuator pads are essential for onboard recording. I use -20dB pads on the onboard recorder, and for external, pass-by recording, it’s worth carrying a selection of pads from -10dB up to -60dB.
8. Cable length.
Assuming you’re not using wireless systems, 5- or 6-metre XLR/lav extender cables are generally the best length for most car recording applications. For front-engined cars, there’s sufficient run to chase in and enough play in the harness of engine and exhaust cables to allow you to move the recorder when getting in and out of the car, or to secure it into position onto a media plate or floor pan if you’re not able to monitor the recording in-cab. For mid/rear engine mounted cars, they can be cinched, coiled and cable tied. Too much cable length in a multi-mic onboard installation can be a real headache; aside from adding extra bulk and weight (which can be a real issue if you’re piggybacking on a shakedown or competition testing), it can be a drain on time tying off messy coils of cabling to avoid hindering the driver and attending engineer’s access.
9. Using arms and pressure cup mounts.
There’s no denying the usefulness of positionable mounts, pressure cups, grips, etc., but when placed on cars travelling at speeds in excess of 130mph, there’s a hefty amount of resistive load on a piece of kit that generally belongs in a photographer’s studio. There are lighter, custom carbon fibre arms specifically for onboard recording, but they’re pretty expensive. Whenever I use an arm on a car’s exhaust mic, I’ll use additional, anchoring pressure cups with clamps and Nite Ize carabiner bungee cables to stabilise the arm. I prefer to use the newer generation of rotary, tooth-tightened, positionable arms (the older, lever bearing joint types were susceptible to wear and prone to slip after being locked). It’s also important to keep suction cups clean and ensure the surface they’re mounted on is clean, flat and free of any dings or particulate that could compromise vacuum pressure. Always prime the pumps on suction cups periodically throughout a session. It’s important as well to maintain and service arms and cups; if in doubt, ‘bench’ a unit and defer to foam and taping microphones on the car.
10. Consumables.
I’ve mentioned memory foam, tapes, zip lock bags, cable ties and so on. It’s worth keeping an inventory of such consumables for on-board car recording. There are plenty of great products out there that won’t break the bank and are fit for purpose when it comes to protecting and securing cabling and mics. Here’s a rough breakdown of a typical consumables ‘load out’ for an on-track recording session:
Rhino White Ultratape. Waterproof, rip-stop gaffer tape for cabling and memory foam on car bodywork, cheaper than Tesa and fit for general purpose rigging.
Viking aluminium foil tape. Used for cabling in an engine bay, and as extra shielding on top of a secured engine mic.
Fire-retardant cable ties. Used for securing mics and cabling in the engine or in locations close to a heat source. 300mm x 4.6mm is a good length for securing a mic to engine bay steel cross-braces and tubular framework. There are larger-width, re-useable ties, but they can be too bulky to attach in tight engine spaces. It’s also worth investing in a good pair of sprung needle-nose snips for cutting them.
Heat-stabilised cable ties. General purpose cable ties for securing mics in-cab, etc. Go for a decent brand like Wurth.
3M Dual Lock (50mm width). Incredibly strong, adhesive-backed industrial interlocking tape. I use it to secure handy recorders and multichannel digital recorders in-cab. It can also be reused if you keep the backing film and the adhesive side clean and intact once removed.
Fire-retardant memory foam (2″ thick). This can be bought directly from manufacturers or furniture upholsterers. Used for building-up mounting points for exhaust microphones, and as small pads for attaching mics to engine bay tubing/anchor points to cushion from rattle and vibration.
Carb clean/de-greaser, water bottle & paper towels. Handy to have on-hand to clean any areas before taping, or cleaning-up after session.
Zip-lock bags, bin bags. For storage, protecting external mics from the elements and binning the tape and ties at de-rig.
3M Scotchprint vinyl wrap. Used as a protective base on which to mount pressure cups on bodywork.